info@gamierfloor.com
0757-85513306

Email format error
Email cannot be empty
Email already exists
6-20 characters(letters plus numbers only)
The password is inconsistent
Email format error
Email cannot be empty
Email does not exist
6-20 characters(letters plus numbers only)
The password is inconsistent

Introduction:
When it comes to enhancing commercial spaces,LVT flooring offers a durable and stylish solution.To ensure a seamless and successful installation,understanding the rightinstallation techniques for LVT flooringis crucial.This comprehensive guide provides B2B users with practical tips and best practices to achieve a professional finish,whether you're a seasoned installer or tackling a DIY project.
---
Pre-Installation Preparation
Assess the Subfloor
• Clean and Dry:Ensure the subfloor is free of dust,debris,and moisture.A clean,dry surface is essential for proper adhesion and longevity.
• Leveling:Check for any uneven areas and address them with self-leveling compound if necessary.A level subfloor prevents future issues like warping or buckling.
Acclimate the Flooring
• Temperature and Humidity:Store the LVT flooring in the installation area for at least 48 hours before installation.This allows the material to acclimate to the environment,reducing the risk of expansion or contraction.
Tools and Materials
• Essential Tools:Gather necessary tools such as a utility knife,tape measure,spacers,and a tapping block.
• Adhesive and Underlayment:Choose high-quality adhesive and underlayment suitable for LVT flooring to ensure a secure bond and added cushioning.
---
Installation Steps
Laying the First Row
• Starting Point:Begin at the longest wall and align the first row of planks parallel to it.Use spacers to maintain the required expansion gap(usually 1/4 inch).
• Cutting the First Plank:Measure and cut the first plank to fit snugly against the wall,leaving room for the expansion gap.
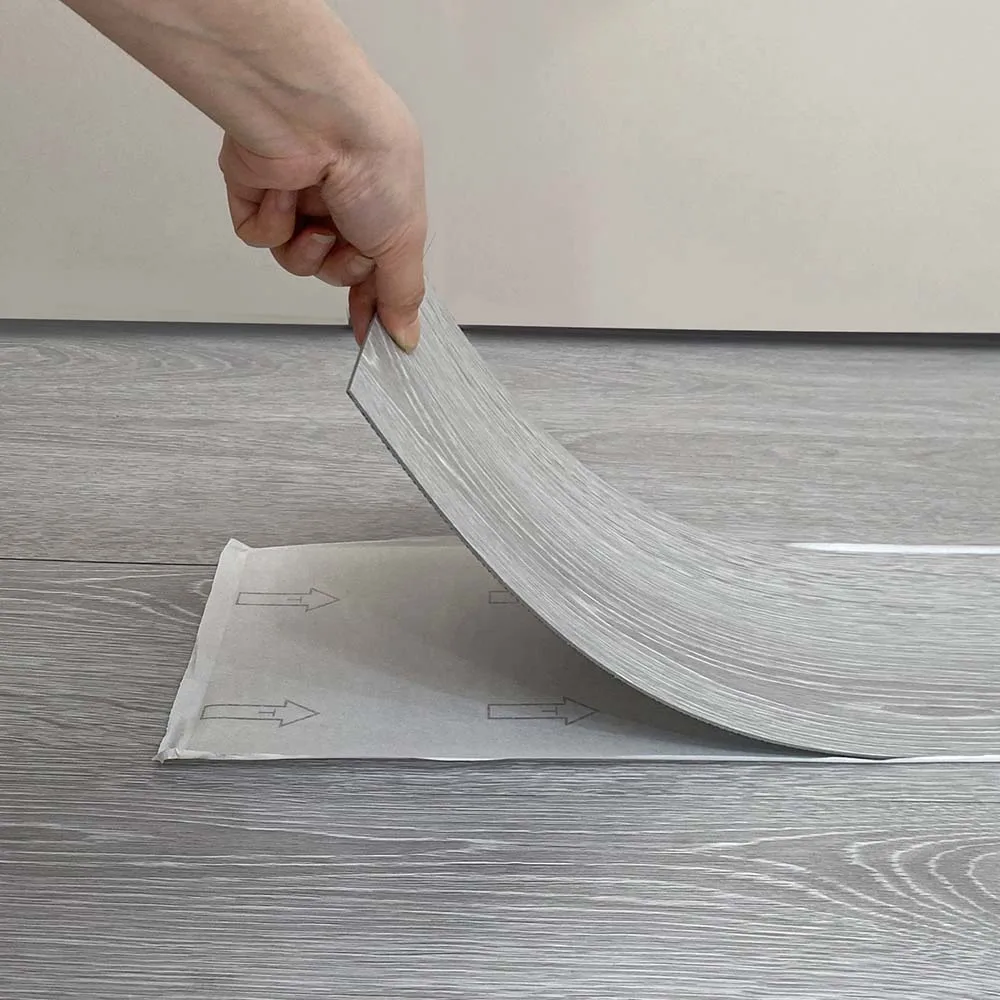
Connecting the Planks
• Click-Lock System:Utilize the click-lock mechanism to connect the planks.Apply gentle pressure and use a tapping block to secure the planks together without damaging the edges.
• Staggering Joints:Stagger the joints of each row to enhance stability and create a more natural look.Aim for at least a 6-inch offset between the joints of adjacent rows.
Installing Around Obstacles
• Measuring and Cutting:Measure and cut planks to fit around obstacles such as pipes,columns,and doorways.Use a utility knife or a saw for precise cuts.
• Fitting and Securing:Test-fit the cut planks before final installation to ensure a snug fit.Use adhesive if necessary to secure the planks around obstacles.
---
Final Touches
Trimming and Finishing
• Edge Trimming:Trim any excess material along the edges using a utility knife or a floor saw.Ensure a clean,straight cut for a professional finish.
• Baseboard Installation:Reinstall baseboards or install new ones to cover the expansion gap and provide a finished look.
Cleaning and Maintenance
• Initial Cleaning:After installation,clean the floor with a damp mop to remove any residue from the installation process.
• Ongoing Maintenance:Regularly sweep or vacuum the floor to remove dirt and debris.Use a damp mop with a mild cleaner for deeper cleaning.
---
Conclusion
Masteringinstallation techniques for LVT flooringensures a successful and long-lasting installation.By preparing the subfloor,acclimating the material,and following detailed installation steps,you can achieve a professional finish that enhances any commercial space.For more detailed advice or to discuss your specific installation needs,contact our experts today.